Monday 22 February 2016

Practise for first design of the continuity assessment.


For my first design of Dorian Gray, I was going to create a dream Sequence where he finds him self taking back the ageing process from the painting and wearing his cruelty and immorality. This scene would come after Sybil Vane had killed herself because of his cruelty and rejection. I was going to create a moral dilemma that would make Dorian decide between his vanity and morality.  

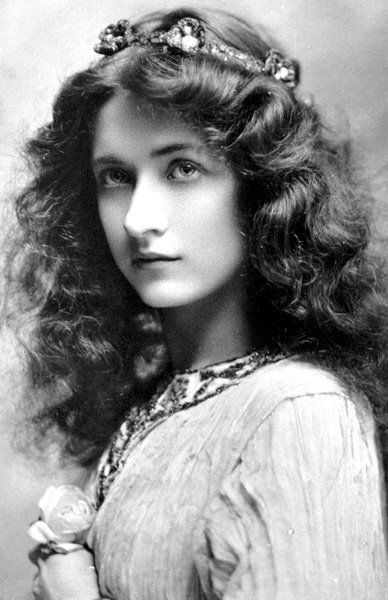
In this scene Dorian would have  greyer complexion, slight evil in his eye and as the book says of the painting. 'a touch of cruelty in the mouth'. I was going to exaggerate this in the dream sequence scene  and create more shadows and redder eyes etc. I also wanted to showcase what the skin colouring might have looked like. At this time london was dingy and factories were being built everyday. The smog was a huge factor so I wanted to grey out his complexion to showcase this. I also wanted to try this because at this time rich people didn't spend a lot of time out doors so they were naturally pale. Dorian also went out a lot so I wanted to make him look a little tired if he was taking his looks back. 

I practised this design on my model Ben.

Health and safety:
  1. Lay couch roll on the work space and set up your station neatly and safely.
  2. Make sure all tools and equipment are clean and sanitary ready for use. 
  3. Cover the model with cape to protect from any fall out.
  4. Decant any products used to protect from cross contamination. 
Tools and Products used:
  1. Cleanser, Moisturiser, toner.
  2. Cotton pads, buds and tissues.
  3. Couch roll
  4. Brushes
  5. Palette knife and Palette.
  6. Spatulas
  7. Supra-color palette Kryolan
  8. Translucent powder
  9. White Base Illamasqua
  10. Concealer Palette Kryolan


Technique:
  1. Prep the skin: Cleanse Tone and Moisturise.
  2. I then cleaned up the skin condition by covering any blemishes with the correct colour concealer.
  3. Apply the white base to the skin and buff in with Kabuki brush
  4. Set with translucent powder.
  5. Start to darken the under eyes with the Supracolor palette using the colours Black, white, and yellow for a slight sallow look.
  6. I also darkens the hollows of the skull with this colour to create a gaunt look
  7. I then exaggerated the wrinkles around Ben's eyebrow frown. to create a more sinister look and a more evil expression.
  8. I also exaggerated Ben's laugh lines to create the evil grin featured in the book. 
  9. I then set this with the translucent powder.
Outcome: 

This application went well. A few things I would change would be having Ben clean up the edges of his beard for the final assessment to create a cleaner finish and for me to be able to continue applying makeup down his neck. I asked him to do this for the final assessment though and he is happy to help. This would then create continuity down his neck and make the colour look like his natural skin colour. I would also define the frown more for photography purposes as this might not show up on camera. I would also try and create the hollows with powder after setting to see if it gave a more natural finish to the look. 
I didn't particularity like the way this came out though and I feel that it looks quite amateur and Halloween like. I really want to capture what I feel Dorian Gray is all about so I have decided to look at more natural and subtle Makeup for My Character and concentrate on getting the period right and the skin clean and natural looking. Dorian was known for being very clean cut and almost pretty looking so I want to try this with my next Design. I want to stick with the story as it is and not continue with my Dream sequence. I know that in the television industry opportunities will come up for period dramas and knowing how to create accurate period makeup looks is very important, So I have decided to use this opportunity to practise my period makeup skills. This look can be just as challenging as maybe more elaborate makeup designs so I want to showcase my skills in this specific area. 

Afro-Caribbean Hair and curly hair Styling in Victorian times.


For my final look I'm Using My sisters Boyfriend Ben as my model. I was worried at first about how I would work his hair to fit my character and also if I would get marked down for my hair design, if it was to simple, because I was keeping it simple. I have looked at afro hair styles and how people with curly and afro hair wore there hair in victorian times and they either had it cut short and shaped or worn combed out and parted to create a bit more sophistication. There weren't a lot of products for Afro caribbean hair, at that time so wearing your hair in its natural state was, for a lot of people, the only option. I am going to experiment with Ben's hair and try parting it. I want to play up on the crazy, looseness of his hair. I can really play up Ben's hair and the clothes I'm going to get as I feel this will create the look I want for the dream sequence.

http://www.everettpotter.com/wp-content/uploads/2015/09/Peter-Jackson-the-heavyweight-boxer-known-as-the-Black-Prince.-London-Stereoscopic-Company.-Courtesy-of-©-Hulton-ArchiveGetty-Images.jpg

Below are a few images I found of afro Caribbean hairstyles and curly hair worn in the Victorian era. 3 are pretty much the same style just with different placements of the parting. I found the first one interesting as this gentleman was able to relax his hair and gel or wax it into a sharp fashionable mens do for this time. It a stark contrast to my other images.


The gentleman on the right has also not over styled his hair. He has left it in its natural state and just parted it in the middle to maybe sharpen his look a little more. 

I am also going to use ben facial hair as an extra to my design. Facial hair was another asset used by men to express there sense of individual style a little more. It was a very popular thing in the late Victorian era to create different styles with your facial hair. Side burns were extremely popular so I have asked ben to create some sharp side burns and a goaty beard as an extra indicator of the times. I think as well that if the beard is cleanly shaved and neat this will add to my character Dorian. He was really sharp with appearance so I want to show this with Ben's facial hair too. This will also gives ben's face more definition and make the makeup application a lot neater and smoother.

Image references:
https://s-media-cache-ak0.pinimg.com/236x/52/2a/5a/522a5af2775bb463712691e717fc8ff5.jpg
http://www.fotoseimagenes.net/imagenes/full/0/9/3/frederick-douglass-2.jpg
https://c2.staticflickr.com/4/3841/19411749365_ee09e52ba6.jpg
http://www.scilynn.org/files/pictures/4696/douglass.png?1359488938
https://janeaustensworld.files.wordpress.com/2008/08/bernier-ingres-1800.jpg

Props and styling in my Final Design:Dorian

http://i.imgur.com/mIw93O5.jpg

Mens Fashion tells a lot about what era The film or programme is set in. When you watch a series or a film you can usually tell what era it is set in just by the clothes they are wearing. They were very tailored and dressed head to toe with class and stature. Canes, top hats, and neck scarfs were the accessories of the time for men of upper society. 

http://designs.vn/public/media/media/picture/4(7).jpg

For my version of Dorian Gray I want to incorporate this into my character design. Dorian Gray was a part of high society at the time the story is set. His Appearance is extremely important to him and he understood the importance your clothes have on the way you are perceived in society. He is a very vain character and he had the money to have every new suit tailored just Perfectly. He kept up with fashions of the time and I want this to show in my final Image.

http://static.wixstatic.com/media/387241_304fbf87f24f211c5d66405962fe386b.gif_1024

I asked Ben my Model for this assignment if he had any suits he explained he didn't so I have decided to get one from the Internet and get him a nice neck scarf as this is mentioned a lot in the story. I also want to look for high collar grandfather shirts to see if I could get a cheap one. This was a popular style shirt in the Victorian era. Men would wear them with a neck scarf and well tailored suit. This was a popular thing when wore in the Victorian era so I feel that this would be a good indicator to my audience of what era my movie is set in. I might see if either I can borrow a suit jacket in Ben's size or see if I can get one in a Charity shop. If not I might also try adapting a regular mens shirt to look like the high collar shirts worn in this time. 

https://janeaustensworld.files.wordpress.com/2008/08/bernier-ingres-1800.jpg

Continuity in Film and Television and its Importance.

http://img.thesun.co.uk/aidemitlum/archive/02768/bloopers-PORT_2768113a.jpg


Continuity in film as a really important factor when making the audience believe what they are watching is real. Or at least pulling them into the story. One noticeable mistake with continuity can completely disconnect your audience from your film and/or character. 

Makeup and hairstyling continuity is a key part of this. If in one scene your character injures himself in a fight scene and has a scar on his lower cheek and then in the next scene its nearer his forehead this will disrupt his audience and make the movie less believable. The makeup artist is responsible for his/her work. They need to document the changing make up with every scene to make sure they can re-create this at a later stage. Bring to the set a Digital camera so you can take photographs of these makeup changes and stick them to your mirror when working so you know what changes you have to make to the makeup application.
Filming scenes either in a movie or TV series can take place at different times that aren't in sequence so knowledge of the screenplay and locations are vital. For example if the movie takes place in both hot and cold countries but at different times to how the movie is edited at the end, you have to take in to account to sun exposure. If the actor has a tan from filming in a hot country but in the film this hasn't happened yet, you need to think about skin colour and correcting to create the right continuity in the film. Paying close attention to the monitors is another good way of keeping an eye on this. 

Document every product used and every product change. Note down tools also so you know what you can use the next time.Bring different foundation shades for these changes and note them down with all of the other changes so that you know what to use next time. Also it is important to note down skin changes, blemishes, scars so that you can solve this same issue is it comes up again. This also helps with knowing what product changes you had to make to adjust to these issues.

You can always make a timeline of the movies storyline and what make up you used for this as this will make it easier with regards to character development. Especially ageing. This can help make the makeup more believable. 

High Definition Television: How it affects Makeup and hairstyling for the media

http://www.geeky-gadgets.com/wp-content/uploads/2010/11/NEC-HD-tech.jpg


High Definition Television:
    " HDTV is a digital TV broadcasting format where the broadcast transmits widescreen pictures with more detail and quality than found in a standard analog television, or other digital television formats. HDTV is a type of Digital Television (DTV) broadcast, and is considered to be the best quality DTV format available."
    http://www.webopedia.com/TERM/H/HDTV.html.
    HDTV has greatly improved the the viewing quality of television shows and movies of today. Everything is magnified and the clarity means that you can see every blemish mark, tiny pore, tiny hair, wrinkle and skin imperfection of the actress/actor on screen. Because of this the makeup artist is under more pressure to create a seamless and perfect application to make sure the viewer doesn't get distracted by the makeup and be able to connect more with the program/movies story.  
    Skin Issues can create a lot of problems when it comes to HDTV. In the past low resolution viewing helped makeup artists and worked with them to create flawless looking makeup. It helped prosthetic and special FX makeup seem more realistic, Lace hair fronts disguised and blood effects look real. Caked makeup, heavy cream makeup application and heavily concealer helped actresses/actors look younger for longer. HDTV has changed all of that. The high resolution picks up every skin flaw and breakout. Every wrinkle is displayed and makeup has to be applied lightly and evenly but with full coverage to make the actor/actress's skin look flawless. This means that the MUA techniques and to be even more superior than they ever have been. We now all see the stars real skin quality instead of what was shown to us in the past. Gone are the days when the viewer thinks the stars skin is perfect. HDTV has exposed the truth about actor/actress's skin condition's. 
    Skin preparation is another key element. It is vital that you use the correct moisturisers, foundation types and powders depending on the talents skin type and condition. A good understanding of skin types and conditions is extremely important when it comes to makeup application for television. You need to know how to problem solve and this only comes with knowledge. You have to keep a close eye when filming begins so that you can spot any mistakes or imperfections with the makeup and correct them accordingly. Colour matching is vital also as this really shows on screen and smooth eye application. With HDTV all mistakes are even more visible on screen. All products and tools need to be well researched and properly used to make sure you know what your doing. 
    Airbrush makeup application is becoming a lot more popular with TV makeup artists as the way the Airbrush makeup is broken down and sprayed on the face in tiny dots that overlap means that the actors skin looks clean and natural and the makeup doesn't look like it is just sitting on the skin. The aim is to make the makeup look like skin. 
    Knowledge of camera and lighting setups is vital to any makeup artist as this means you know what works with what. You know what lighting settings, camera settings and makeup look good together and this also helps with problem solving. Technology is growing everyday so its important to keep up to date with it so that you can adjust and expand your makeup application skills accordingly. 
    learning this was really interesting as I didn't realise how important this was before. I will be taking this in to account when I create my Final look for this Continuity project. 
    Reference: Suzanne Patterson, (2009), The impact of high resolution media and makeup, Creative Artistry and FX, available from: http://www.creativeartistryfx.com/high_resolution_media.pdf

Wednesday 17 February 2016

Late Victorian Hair with Helen Keelan.

Late Victorian hairstyles with Helen Keelan.


Today in Helens class we learned how to do a hairstyle from the late Victorian Period. 1860 to 1870. The hairstyles had changed a lot in this period. The hair had been swept from around the face and pulled back in sweeping styles that were more flattering. They were more elaborate and had a lot of height and layers, plaits and twists. Women started to become a bit braver when adding accessories to the hair. They would add beads, feathers, ribbons, and dried flowers to create intricate designs that created more height in the hair. Women were wearing the fringes short and curls so that they were off of their faces. Some women would also add hairpieces that were called switches. These were useful as; if you had thin hair this would allow you to create thickness and layers to your hairstyle. Women would get these pieces from there hairstyles and these were worn most of the time if you could afford it. Women from high society would be the main clients for these.

Magazine articles contained styling tutorials. The one we looked at today had the lady putting french braids at the side of her hair. The start of the civil war in America had a huge part in defining how women wore there hair in this period. They wanted their hair off of their face so that they could work in there more physical roles. Victorian women also add texture by creating the frizz rick-racking which we saw in the Elizabethan era also. Francois Marcelle created the first curling iron. He pain-tented the curling irons. This was huge for women as this created a quicker and easier way of styling there hair. They could buy ready styled hair pieces also from there hairdressers. Salons in this time would have these as another beauty accessories. These were used for bulk, layering, and hair decor, They also added dimension. They can be called switches today.

We also learned about Alice Liddell, The original Alice. Lewis Carrol one day, was on a boat with a friend and his friends daughter called Alice was there. This was in 1865. Lewis would tell his friends children stories of a girl called Alice who goes through the looking glass. He then wrote them down and created the Alice tales we all know and love today. 
We also learned about Major General Burnside. He was a key figure in the American civil war. The term 'side-burns' came from him as he was famous for his sideburns. Charles dickens was also a huge fan of the beard and would fashion his until his end. This created the long beard trend.  

Helen gave us a tutorial before we bagan to show us how to prep the hair before styling.  We then began prepping our own Katie heads.


1.   Brush through your Katie heads clean hair to make it easier to put in rollers.
2.     Create a centre parting and begin by adding the rollers vertically. 2 curlers just off of the face. Example below. Make sure to secure the rollers with either a grip, clip, or metal securer. 
3. Then add 2 rollers horizontally just off of the face underneath the two at the top. 
Do this all the way around the face on both sides. 
4. I then put the crown section of the hair in a pony tail and then a triangle section underneath in a pony tail.
5. I then curled the pony tails and the rest of the loose hair.
6. I then pinned the hair in the pony tails around the scalp to create a loose curls up-do look. 
7. I then created some tighter ringlets around the bottom of the scalp. 
8. I then used this time too add accessories to my Katie doll.


Outcome and thoughts:

I really like the late Victorian hairstyles. They seem a lot more fun and whimsical then the early styles. I feel like they were more creative with there styles. I did however find putting in the rollers really hard and did find myself getting frustrated at the fiddly aspect of the application. I struggle with patience so this was challenging. Helen had to help me with my technique and I did find that the more I went on I was finding it a lot easier but I definitely need more practise. I really am going to keep practising this as I really love creating this period hair and rollers are a big part of creating this periods shapes. 


Tuesday 9 February 2016

Mens Beauty in Victorian Times.


In the Victorian era it seems that Male beauty and vanity was just as important as women's. Although there clothes weren't as elaborate as the women's, and may not have donned feathers and other elaborate accessories, they had a particular style and used what they had to make a statement. Mens appearance, at this time, was very significant when it came to showcasing there wealth and position in society. The way you dressed told people what you did for a living. It told people your social position. They needed to wear the latest fashions in the latest colours, patterns and materials. They would also play with the hairstyles and moustaches. Sideburns were also very popular at the time. 
In the Victorian era, it was probably one of the first times it was fashionable in society to have shorter hair. they would part it and usually style it slicked back and usually in a side parting. They would comb it with oil to create the perfect coif. This would then be accessorised by there beards and sideburns which I have shown below. this is the first time men were getting really creative with there facial hair.  


https://s-media-cache-ak0.pinimg.com/736x/24/2d/0e/242d0e652cea6c1db9e7695f429ed1c8.jpg

I love this era for hairstyles and interesting beards. I feel like you can create a lot of different looks. I feel like they used there beards because they could accessorise in the same way as women. 
I wanted to have a look at this to see what I can incorporate into my final Design. Ben (my model) Has just grown his beard so has offered to shave it for the final design. I wanted it to be correct period wise so luckily there are so many different styles that I can use to create Dorian as a more sinister character. 

Saturday 6 February 2016

Cuts and Bruising with Sue Mainstone


Today in Sue's lesson we learned about cut and bruises and importance of continuity. Sue talked about The movie industry and the continuity between scenes. With cuts and injuries continuity is the most important thing. Sometimes there are hours, days and weeks between takes and they can also be held in different settings. Its important that you do your research and take loads of pictures of your work so that your works looks the same each time you do it. There is nothing worse then seeing a cut move from shot to shot. 
Sue then walked us through a demonstration. She talked about the different products she uses and the technique needed for this type of work. 

Health and Safety.

  1. Cover your model with a cape.
  2. Wash you hands
  3. Check that your client has had an allergy test. 
  4. Make sure your work space is clean, clear of rubbish and organised.
Tools and products.
  1. Cine-wax
  2. latex
  3. sealer
  4. black stipple sponge
  5. wound filler
  6. cuts wheel, bruise wheel, Ben Nye
  7. Collodian Charles Fox
  8. Tuplast
  9. Hair dryer
  10. Palette Knife
  11. Acetone
  12. Aged Blood in dark
  13. Cotton Buds
  14. Palette
  15. Makeup Brushes
  16. Paint Brushes
  17. Couch roll
  18. Tissue

Technique

  1. Apply the wax with a palette Knife. You can use a knife to blend this out.
  2. Layer it depending on the deepness of the desired cut
  3. Then using the palette knife, you make the cut by slicing through the wax.
  4. Cover and seal it with latex, in thin layers using the dryer to dry the wax in between. 
  5. Wait until the latex has gone clear.
  6. You then cover with foundation. Use a few shades to give a natural coverage.
  7. Then using a pin you put the wound filler in the cut
  8. You can then fill with blood and create scratches with the stipple sponge.
  9. Go over with a bit more colour to get depth from the cut.


Outcome

I really enjoy doing SFX makeup although I do find it really difficult as the technique doesn't come naturally. Latex I find really hard to work with. I am definitely going to practise this so that I can really master the technique. Im looking forward to learning more about SFX makeup.

Wednesday 3 February 2016

Victorian Beauty.

http://31.media.tumblr.com/tumblr_m95aoczQxr1r4cri7o3_400.jpg
Victorian Beauty is a complete contrast to Elizabethan Beauty. When Queen Victoria Came to the throne she hated makeup. She thought it belonged on the streets with prostitutes and on stage with actresses. Women did, however, wear makeup they just wore makeup that was more natural. The no makeup makeup look. The makeup ingredients didn't much change from the Elizabethan times too. 

Eyeshadow- Lead and Antimony Sulphides
Lipsticks- Mercuric Sulfide
Blusher- Beet juice
Eyebrows- Slightly Plucked for a clean natural shape. 
Powders were used sparingly on the face and only over an oily complexion. Rice powders were just one example.

https://s3.amazonaws.com/lowres.cartoonstock.com/fashion-glove-kid_gloves-kid_gloves-clean-cleans-csl2110_low.jpg


Victorians did go through different phases as Victoria had a long reign and fashion changed through her life time which then filtered through to the aristocrats of that time. Applying rouge to the cheeks and lips was a short lived trend and it was used to ecentuate the under eye circles. Women at this time also used to draw blue veins on there face. This was all to look paler as this was seen as beautiful.

These tricks were to capture the natural beauty of a woman. That meant that you had to take extra special care of your skin to ensure that you didn't need makeup. Victorian women became very practical when it came to home remedies. They would concoct these creams, oils and potions (Almond oils and waxes,  Toners were a mixture of water, roses, lillies or violets) in the hopes of keeping blemishes and other unsightly marks at bay. Beauty parlours also became very important places for women of a higher class to go. They would usually go in secret and with discretion from the women who worked there. Beauty product specialists like Guerlain in Paris were celebrated by women including the Empress Eugenie and Elizabeth of Austria. It opened its doors in 1828. Rimmel in London was a 'perfumer by appointment to the princess Alexandra. Rimmel opened in 1920. The fact that 3 royals used these products created a stir. These women were celebrated for there beauty, from writers in fashion journals to artists across the board. Notibly the Artist Winterhalter. He was known for painting women like photographers capture Hollywood stars. He loved capturing the makeup application and natural beauty look.

Hair was also an important part of female beauty in the early victorian days. A beauty manual declared in 1839 'It is the hair that adds the principle feature to a beautiful female- it is the luxuriant tresses that frequently arrest the attention and excite the admiration of the opposite sex'.
The hair was always parted in the middle with curls and ringlets the most popular style to frame the female face.

http://i1.wp.com/madameguillotine.files.wordpress.com/2012/03/object-7.jpeg


A ritual of hair washing. 

'Women were advised to wash their hair in tepid water, with alkaline soap, and when it was dry ' a little marrow pomatum, bears grease, or fragrant oil, should be sparingly used'; two brushes were needed (one a polishing brush) and they were dipped in eau-de-cologne before being used. As for hair-styles.'

https://s-media-cache-ak0.pinimg.com/736x/68/f6/9a/68f69aadae6d41498a1b66d2de804db0.jpg


Women needed to be skilled in the art of hair styling and if they weren't they should have a ladies maid that was able to not only be a good dressmaker, cosmetics expert but also a hairdresser. It was of the up most importance that they looked there best at all times. The Victorian times were all about polished, finished and styled looks. Everything about they're appearance had to be perfectly harmonised. Everything complemented each other from the dress, the hat/bonnet, the accessories to the hair and minimal make up.

http://img0.etsystatic.com/000/0/5283849/il_fullxfull.297338004.jpg

Early Victorian Hairstyles. With Helen

Second attempt. I didn't manage to finish the curls in time.
Today in Helen's class we learned about classic Victorian hair. We learned about the shape and texture and also how many different styles there were and how they changed as the Victorian period. We were looking at the early period from 1830's to the 1860's. The Victorian hairstyles were very precise. They usually had a middle parting, with a bun at the back and side detail. They seemed to focus a lot on the sides as this part of the hair framed the face and was really the only part of the hair you could see with a hat or bonnet on. Bonnets were particularity popular in this early period. 
The women of this time would either curl, twist, or plait the side sections. In the earlier days the hair was higher and as the era went on the side section plaits or curls got lower and lower. 

First style attempt.


Step by Step.

  1. Firstly I split the hair into 3 sections. 2 at the sides and 1 at the back. 
  2. I clipped the two side sections at the front so they were out of the way and then brushed the back section so that it was neatly put into a pony tail. 
  3. Once it was in a pony tail, I split the pony tail into 2 sections and plaited them. I then wrapped them around the pony one after the other and then clipped them in place. 
  4. I made sure there were no loose hairs and then moved on to the side sections. 
  5. For my first style I brushed the sections out and starting with one side started to plait one section from below the ear letting it hang under the ear and connect to the bun. 
  6. I then clipped these in place. I continued this on the other side. 
  7. I then put some wax over them to sleek them down. 
  8. Once I had completed this I then took out the plaits and began to curl the hair to give a different style. 
  9. I sectioned each side section into 4 little sections. I then began to curl each section. making sure they made a sausage shape. I pulled out and rolled the hair in the curlers. Making sure they are sitting where the curls will fall.
  10. I then let the curls go from the tongs. I then positioned them in the right place.
Outcome. 

I really enjoyed this lesson. I love the sleekness of Victorian styles and how symmetrical they were. I also saw some images that seemed really modern in the slides shown by Helen. One woman had her hair moulded into a bow shape which I thought was really forward thinking for the time. It really opened my eyes to how much, with regards to hair styling, we recycle. 
I think I have the basic technique down, but I definitely need to practise my curling. I wasn't positioning the curls in the right place. Helen then gave me a little help and showed me the correct way. I will practise this at home and document it so that you can see my progress.